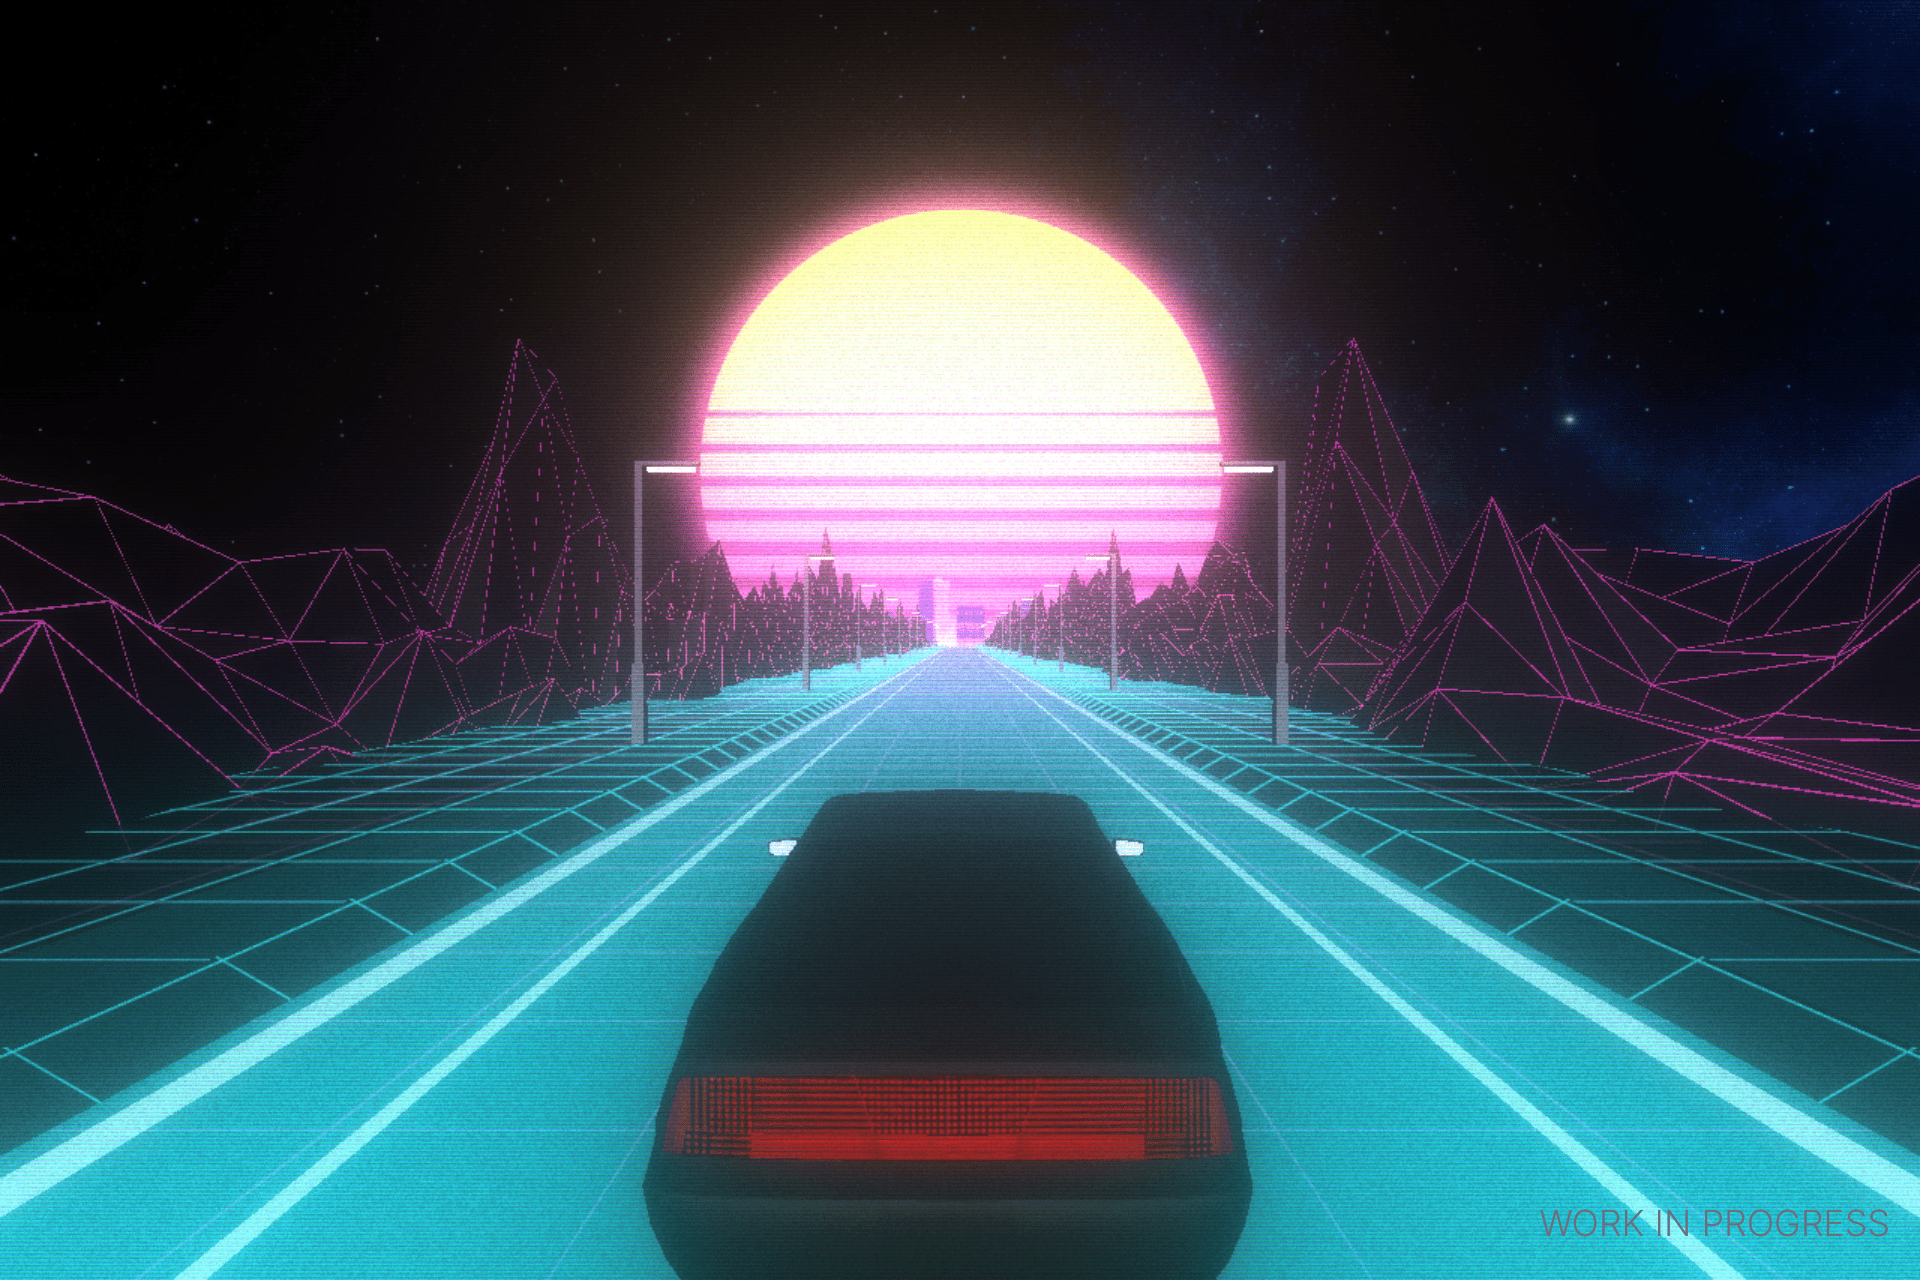
Where do I start? What is a retrowave even? Well, take a look at the cover image, that's a pretty good definition I think. Next question that comes up is why, of all the things I could make in Three.js, did I settle on a retrowave? I think it's a result of my fascination with the 80's. I always found the decade very interesting, it was full of cultural and technological developments never seen before. So I guess that, along the fact that I'm a software developer, got me into the Outrun/retrowave micro genre of music.
You got a lot of hours to listen to all kinds of music when you spend most of your day on a computer.
The origins
I have Buildcode to thank for the knowledge I got about Three.js. I did a lot of work in Sitemotion back then, which is a 3D Visualizer. I touched parts of 3D-modelling and programming concepts I never imagined I would get my hands on.
So inevitably, I of course ended up Googling whether someone had made a retrowave in Three.js before, and needless to say, there was a lot of results. That was important, because that means there is a lot of resources to help me create my own.
Time for some R&D
When starting a new project like this, I had to do some research before hand. There is a saying: one does not simply walk into Mordor. The same can be said with undertaking a project like this; there was a lot of programming challenges to overcome.
You can easily make out what a retrowave scene consists of. There are a lot of recurring elements they all have in common. Some of these include: A square grid, a background of some sort, the neon sun, spacy skies - you get the idea.
I already knew which approach to use for the neon-like sun, and I understood most of the fundamental things such a scene should contain. Some of the bigger challenges was in particular, the mountains, the moving grid lines, and the car I had planned to add as well.
Creating the mountains
Figuring out how to create the mountains (those on either side of the road) was quite the process. I had to do a lot of research beforehand, as I had no idea how to create random looking terrain. I learned there was several ways to do this, but I eventually settled on a technique known as height mapping to generate the mountains.
You can apply a 2D texture onto a 2D surface to create depth - and thus create a 3D element, in Three.js. Using the color depth of the image, it is possible to translate color values into height values.
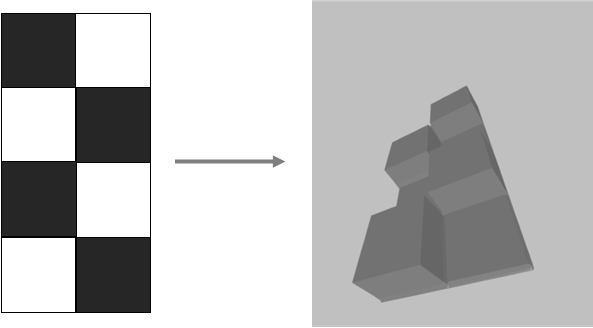
Using this technique, you can create a lot of complex looking terrain in a somewhat random fashion (although it will never be truly random). To achieve some more variation in the mountains, I mirrored the 3D model onto the opposite side of the road. This creates a reasonable-looking set of mountains on either side.
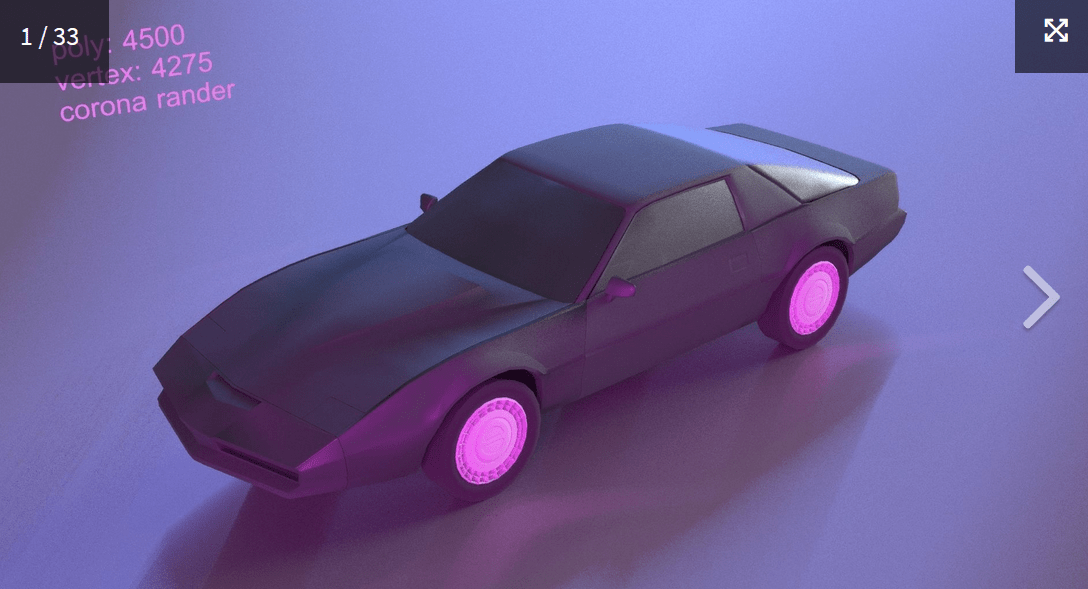
Adding a 1982 Trans-Am to the scene
I knew right from the start that I wanted to add an iconic 1980's car to the scene, but it had to meet a few requirements:
- It had to be a low-poly model
- It had to be rather small in file size
- It had to look cool (wow right?)
I managed to find one on the website cgtrader.com, but it had some work to be done to it, because when I added it to the scene, it was nothing but black. This was also not something I could solve through programming (trust me, I tried).
So, I got in touch with a friend who had a lot of experience in a 3D-software named Blender and got her to do all the work and export the model into a usable format (such as GLTF).
After the 3D model had been processed through Blender, it would finally reveal itself in the scene.
Creating the illusion of infinite-scrolling terrain
If you have ever seen a music video of a retrowave, you will know it seem to be going on forever. In order to achieve this effect, I used a combination of shaders and constant updating position values in real-time. Let's dive into each of those solutions and see what they are about.
Using shaders in Three.js
Shaders consist of two parts: vertex shaders and fragment shaders. It's a small program written in GLSL that runs on the GPU. The vertex shader runs first and handles all the position calculations of each individual vertex. The fragment shader then runs right after and applies the correct color to each pixel on the screen. As you can imagine, this all happens very fast.
I used shaders to create the moving grid and then apply it to a material.
To get an overall idea of what shaders can do, Shadertoy is a cool place to check out.
Creating movement using position values
Another method to get things to "animate" in Three.js is to use the render() or animate() method. As the name applies, it's the function responsible for making things appear and move around on the screen.
In this method I animate the mountains and light posts. I update their position so they move closer towards the camera every frame. Then once they are behind the camera, I reset their position to begin from far away so they can go through the entire cycle once more - and this happens again and again.
You just created the illusion of scrolling terrain.
Future plans for Three.js
I want to use Three.js to create creative web solutions for clients, as it has so much potential. You can do some clever programming to make animated elements blend in with the rest of the website so the user can't tell where or if an element is animated at first.
You can check it out right here on my website: https://andre-gollubits.dk/retrowave